EV Charger Wall Mount Height: How High Should You Install It?
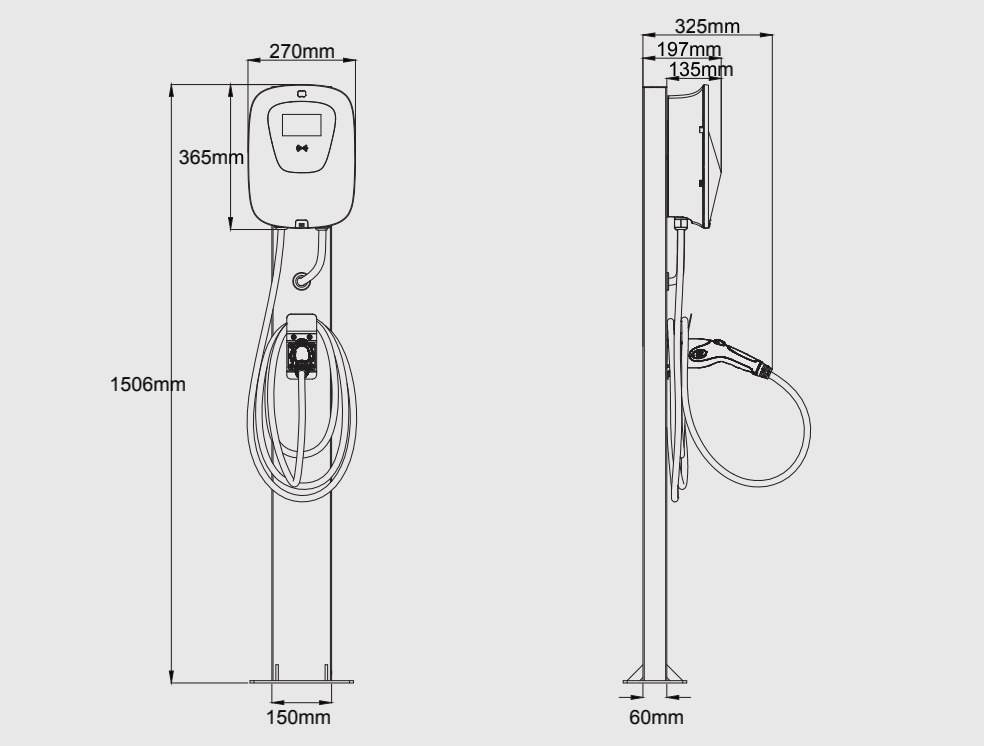
Most residential Level 2 EV chargers are mounted 48 to 54 inches to the center of the unit, which keeps the connector at a comfortable waist-to-chest height. The right number for your garage still depends on your vehicle’s charge port height, the cable length and bend radius, and your manufacturer’s instructions and local code.
EV charger wall mount height is usually a simple answer — roughly 48 to 54 inches to the center of the unit — but the right number for your garage depends on your car’s charge port location, your cable length, and your local electrical requirements. Get it wrong and you will spend years wrestling a stiff cable or putting unnecessary strain on the connector.
- Compatibility: Measure your vehicle’s charge port height while parked before choosing a mount height.
- Performance: The vehicle’s onboard charger, not the EVSE, caps AC charging speed.
- Safety: Follow the manufacturer’s mounting range, cable bend radius, and local electrical code.
- Cost: Height rarely changes electrical cost much, but relocating a wired unit later does.
EV Charger Wall Mount Height: The Short Answer
Common Height Range: 48–54 Inches to the Center
Most residential Level 2 EVSE installation manuals specify a mounting height, and a large share of them land in the 48-to-54-inch band measured to the center of the enclosure. That range puts the holster and connector at roughly waist-to-chest height for an average adult, which makes the plug easy to lift, insert, and stow without bending low or reaching overhead.
Treat that range as a starting point, not a rule. The manual for your specific unit is the controlling document, and some manufacturers give a wider or narrower window than the range above.
Why There Is No Universal Height
Four variables move the number up or down: where your vehicle’s charge port sits, how long the cable is, what is already mounted on the wall, and what your local jurisdiction requires. A crossover with a front-fender port and a pickup with a rear-bed port can demand different mounting heights in the same garage.
Climate matters too. A homeowner in Minnesota clearing snow around a driveway pedestal faces different constraints than a homeowner in Arizona parking inside a finished garage.
How to Measure for Your Specific EV and Garage
Start with the vehicle, not the wall. Park where you normally park, then measure from the floor to the center of the charge port. Note whether the port is on the front, rear, or side of the car, and whether the cable will need to cross in front of or behind the vehicle.
Next, check the manual’s stated mounting range and cable length. If the cable is short and the port is far from the wall, you may need to mount lower or closer to the vehicle’s parking position rather than higher.
Cable Length and Vehicle Charge Port Position: The Real Height Drivers
Measuring Your EV’s Charge Port Height
Use a tape measure from the garage floor to the center of the charge port while the car is parked in its normal spot. Most passenger EVs land somewhere between roughly 24 and 40 inches, but that varies widely by model and by ride height, load, and tire size.
Add a few inches of buffer for sag. A heavy cable hanging from a high mount will droop below the port and pull sideways on the connector; a cable routed from below will push upward. Ideally the cable approaches the port roughly level or with a gentle downward arc.
How Cable Management Affects Your Mounting Height
Cable management hardware — holsters, hooks, retractors, and cable cradles — changes the effective geometry. A retractor mounted above the EVSE may require extra clearance, and a low holster can create a sharp bend near the connector if the unit is mounted high.
Manufacturers typically publish a minimum bend radius for the cable. Bending tighter than that spec repeatedly is one of the more common causes of premature cable or connector wear.
Snow, Flooding, and Accessibility Considerations
Outdoor installs near a driveway may benefit from mounting higher than a garage install, keeping the connector and holster clear of plowed snow banks and standing water. That said, raising the unit too far can make the cable hang awkwardly and make the connector harder to reach for shorter household members.
If someone in the household uses a wheelchair or has limited reach, check the reach ranges commonly cited in US accessible-design guidance and confirm whether any local rule applies to your installation. Private residential garages are generally not covered by public-accommodation accessibility rules, so this is usually a comfort decision rather than a legal one.
Electrical Code, Permits, and the Product Manual: What Actually Governs Installation
Why There Is No Universal Breaker or Wire Size
EVSE amperage, circuit rating, conductor size, and overcurrent protection are determined by the equipment instructions and the adopted electrical code in your area — not by a single national number. A 48-amp EVSE and a 40-amp EVSE do not share the same circuit requirements, and the wire size can differ as well.
If you are planning the circuit, our breakdown of 48-amp EV charger wire size and the separate question of whether a 48-amp charger needs a 60-amp circuit cover how those variables interact.
Plug-In vs. Hardwired EVSE: Height Implications
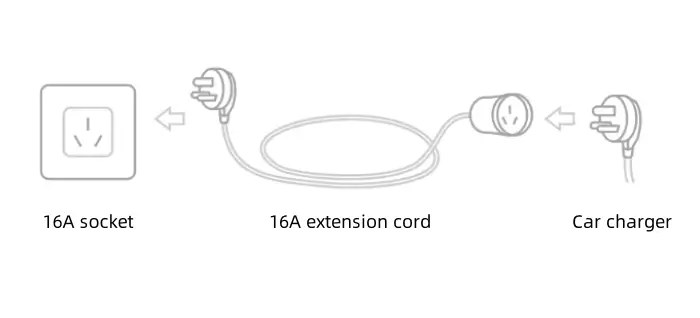
Plug-in units need a receptacle within cord reach, and the receptacle’s own height and location constrain where the EVSE can go. Many plug-in models also use a shorter supply cord than the vehicle cable, which limits mounting flexibility.
Hardwired units typically offer more freedom because there is no plug to accommodate, but the wiring method, conduit routing, and disconnect requirements still shape the layout. Hardwired installation is also common for higher-amperage setups; our roundup of hardwired 48-amp EV chargers explains why that configuration shows up so often.
Local Amendments and ADA-Inspired Best Practices
Some jurisdictions add their own requirements for EVSE placement, clearances, or accessible parking. For a private home garage, these rarely apply, but multifamily and commercial installations face a different set of rules.
Even where no rule applies, mounting at a comfortable reach height is a practical courtesy for anyone who shares the charger.
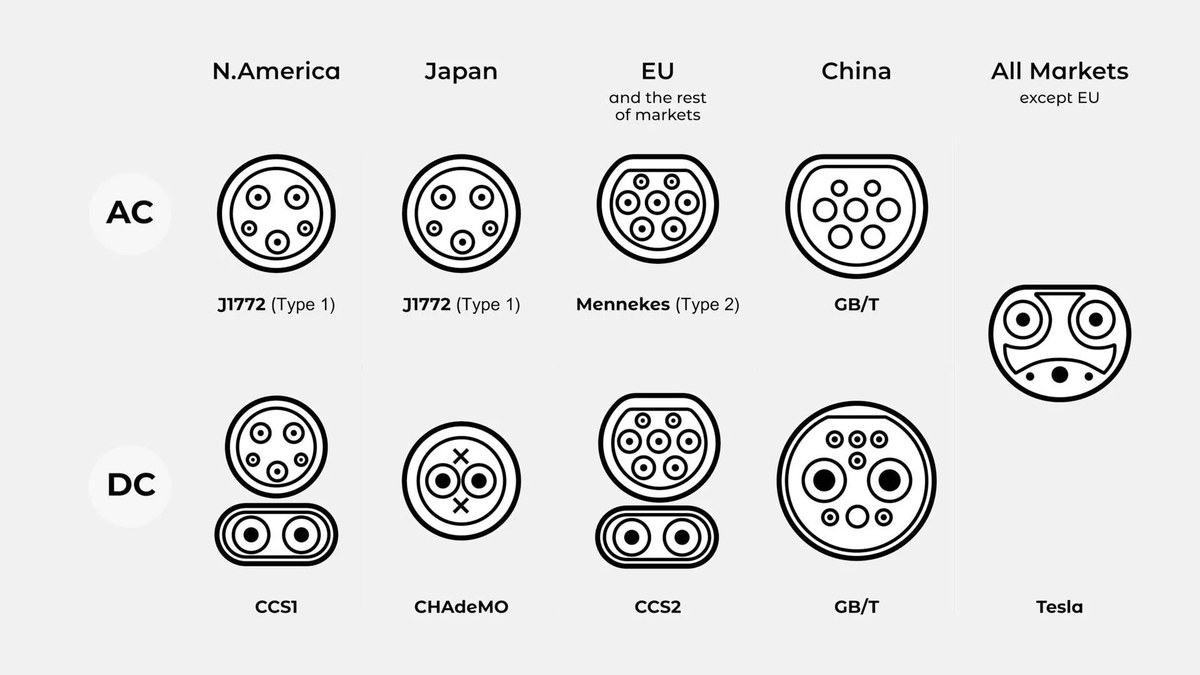
EVSE Amperage, Vehicle Onboard Charger Limits, and Connector Types
How EVSE kW and Amperage Affect Charging Speed
The EVSE sets the ceiling on how much AC power can be delivered, expressed in amps at a given voltage. A 40-amp unit on a 240-volt supply is roughly a 9.6 kW ceiling; a 48-amp unit is roughly 11.5 kW. Those are approximations that depend on the actual supply voltage.
If you are deciding between common sizes, our explainer on whether 40 amps is enough for a Level 2 charger walks through the trade-offs.
The Vehicle’s Onboard Charger Is the Bottleneck
Here is the distinction that trips up a lot of new owners: the EVSE is not the charger. The charger that converts AC to DC lives inside the vehicle. If your car’s onboard charger tops out at 7.2 kW, buying an 11.5 kW EVSE will not make it charge faster.
Check the vehicle’s maximum AC acceptance rate before paying for extra EVSE capacity you cannot use.
Connector and Cable Weight at Different Heights
Higher-amperage cables are typically thicker and heavier. Mounting a heavy cable assembly too high means more of its weight hangs from the connector, and mounting it too low means more of the cable drags on the floor.
Neither extreme is ideal. A mid-height mount that lets the cable rest in a gentle loop is usually the easiest on both the hardware and your back.
Weather Suitability, Smart Features, and Warranty Support
NEMA Ratings and Outdoor Mounting Height
Outdoor suitability is determined by the enclosure’s verified weather rating and the manufacturer’s stated operating limits — not by how the unit looks. A NEMA-rated enclosure is designed for a particular level of protection, and the manual will state whether outdoor installation is permitted and under what conditions.
Do not assume outdoor approval from marketing language. Check the product documentation and the certification record.
Smart Features That Influence Placement
Wi-Fi and cellular connectivity, RFID readers, screens, and status LEDs all have practical placement implications. A unit buried behind a parked car or inside a metal cabinet may struggle with signal, and a screen mounted below knee height is hard to read.
Consider what happens if the app or cloud service is unavailable. Many smart chargers still deliver a charge without connectivity, but scheduling and energy-monitoring features may not — check the manual for the offline behavior.
Warranty and Support Considerations for DIY vs. Pro Install
Many manufacturers require installation by a licensed electrician or compliance with local code to keep the warranty valid. Improper mounting, undersized wiring, or a missing permit can void coverage regardless of who did the work.
Keep the receipt, the permit record, and the installer’s documentation. If a warranty claim ever comes up, those are the first things you will be asked for.
Step-by-Step: How to Determine Your Ideal Mounting Height
Tools and Measurements You Need
You need a tape measure, a level, a pencil, and the manufacturer’s installation manual. A stud finder helps if you are mounting into a wall rather than a pedestal, and a helper makes the mock-up stage much easier.
Mock-Up Before You Drill
Hold the unit — or a cardboard template of the same dimensions — against the wall at your proposed height. Have someone sit in the driver’s seat and confirm the cable reaches the port with slack to spare.
Walk the full cable route. Check for doors, shelving, bikes, and anything else that could pinch or snag the cable. Then step back and confirm the unit is not blocking a walkway or a vehicle door.
Final Checks Before Powering On
Confirm the mounting hardware is appropriate for your wall type and rated for the unit’s weight. Verify torque on any electrical terminations per the manufacturer’s instructions, confirm the breaker and circuit match the equipment requirements, and make sure the installation passed inspection if your jurisdiction requires one.
Read the manual for the mounting height range, clearances, cable bend radius, and indoor/outdoor suitability.
Confirm circuit rating, breaker, conductor size, receptacle or hardwire method, and permit requirements with a qualified electrician or your local authority.
Test the height with the actual vehicle parked in place before drilling, then follow the product instructions exactly.
Common Mistakes and Troubleshooting After Installation
Mounting Too High or Too Low
Mounted too high, the cable hangs and pulls on the connector, and shorter drivers may need a step stool. Mounted too low, the cable drags on the floor, picks up grit, and the connector becomes a trip hazard.
Both problems are fixable, but relocating an already-wired unit usually means new holes, patched drywall, and possibly a longer or shorter cable run.
Cable Strain and Connector Wear
Repeated strain at the connector is the most common long-term consequence of a poorly chosen height. Watch for a cable that stays taut when plugged in, a connector that sits at an odd angle in the port, or a holster that forces a tight bend.
If the cable is always under tension, the mount is in the wrong place.
When to Call an Electrician
Call a licensed electrician if you are unsure about circuit capacity, panel space, grounding, GFCI requirements, or the wiring method. Call immediately if you notice heat, discoloration, a burning smell, or a breaker that trips repeatedly.
Cost Factors: Installation, Equipment, and Height-Related Trade-offs
Assumptions and Formulas for Installation Cost
Installed cost is not just the price of the box. A workable formula is:
Total installed cost = EVSE price + permit fees + electrician labor + materials (wire, conduit, breaker, mounting hardware) + any panel upgrade
Labor and materials scale with run length, wall type, and whether the panel has spare capacity. A short run through an unfinished garage wall is a very different job than a long run through finished space.
Separating Electricity Rate, kWh Delivered, and Charging Losses
Charging cost is separate from installation cost. The basic formula is:
Cost = (kWh added ÷ charging efficiency) × electricity rate
AC charging is not perfectly efficient; some energy is lost as heat in the onboard charger and wiring. Time-of-use rates, demand charges, taxes, and fixed fees can change the effective rate substantially, so verify your current utility tariff rather than assuming a national average.
How Height Choices Can Affect Labor and Materials
Height itself rarely changes the electrical cost much, but it can change the materials list. A higher mount may need a longer supply run or additional conduit; a lower mount may need cable management hardware to keep the cable off the floor.
Relocating a unit after installation is where height mistakes get expensive — new holes, patched walls, and a second electrician visit.
- Best for: Most garages land comfortably between 48 and 54 inches to the center, adjusted for your vehicle’s charge port height and cable length.
- Think twice if: You are choosing a height before measuring your car’s port and confirming the manual’s stated range and cable bend radius.
- Next step: Park the car, measure the port, read the manual, and mock up the mount before drilling anything.
Frequently Asked Questions
There is no national standard for residential EVSE height. Many manufacturer manuals specify a mounting range, and 48 to 54 inches to the center of the unit is a common band. Your product manual and local code control.
Mounting somewhat higher can keep the connector and holster clear of snow banks and standing water, but only if the enclosure is rated for outdoor use and the cable still reaches the port comfortably. Verify the weather rating and operating limits first.
No. Charging speed is determined by the EVSE’s output setting, the circuit capacity, and the vehicle’s onboard charger limit. Height only affects ergonomics, cable management, and connector wear.
Park the car in its normal spot and measure from the floor to the center of the charge port with a tape measure. Repeat with the car loaded if you regularly carry heavy cargo, since ride height changes.
Some homeowners handle the physical mounting, but the electrical work involves mains voltage, permits, and inspection in many jurisdictions. Manufacturer warranties often require licensed installation. When in doubt, hire a qualified electrician.
The cable hangs under its own weight and pulls on the connector, which can accelerate wear and make the plug awkward to insert. It also puts the holster out of comfortable reach for shorter household members.