Level 2 EV Charger Installation Cost: What to Expect
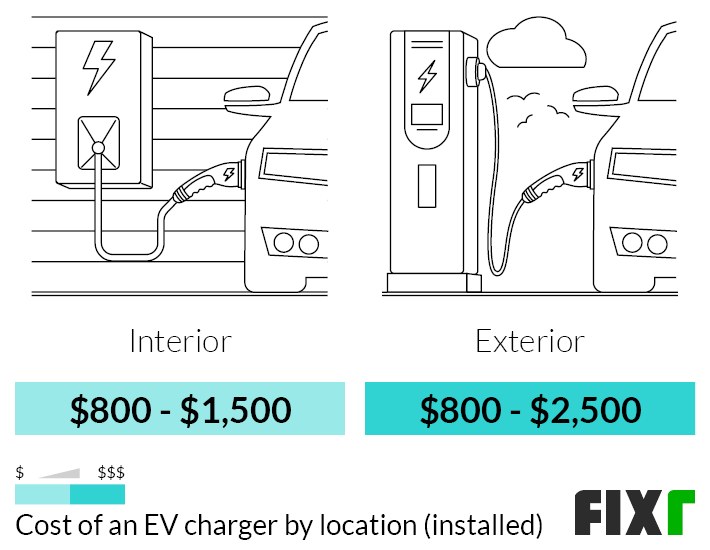
Level 2 EV charger installation cost in the U.S. usually falls between about $800 and $2,500 for a straightforward install, with a panel or service upgrade pushing it well past $5,000. The main check is your panel capacity and circuit-run length, not the charger’s sticker price.
Level 2 EV charger installation cost in the United States usually lands somewhere between roughly $800 and $2,500 for a straightforward garage or driveway install, and it can climb past $5,000 when a panel or service upgrade is required. The charger itself is often the smallest line item — your electrical service, the length of the circuit run, and local permit and inspection rules drive most of the difference.
- Compatibility: Confirm your vehicle inlet (J1772 or NACS/SAE J3400) and match the EVSE connector or.
- Performance: Your vehicle’s onboard charger caps AC acceptance, so a 48 A EVSE will not.
- Safety: Breaker, conductor, and receptacle requirements come from the manufacturer’s instructions plus locally adopted code.
- Cost: Budget equipment, labor, permit, and possible panel work separately; a load calculation is the.
Level 2 EV Charger Installation Cost: Quick 2026 U.S. Answer
For most single-family homes with adequate panel capacity and a short run from the panel to the parking spot, owners should budget for a mid-three-figure equipment cost plus a few hundred to roughly $1,500 in labor, with permits and inspection adding a smaller amount on top. Homes that need a panel upgrade, a subpanel, a long conduit run, or trenching sit in a different bracket entirely.
Treat every number below as a planning estimate, not a quote. Regional labor rates, union versus non-union pricing, local permitting fees, and the specific equipment you choose all move the total. The only figure that matters for your decision is the one a licensed electrician gives you after seeing your panel and your parking location.
Typical 2026 Ranges for Equipment, Labor, Permits, and Panel Work
| Cost component | Commonly reported range | What drives it |
|---|---|---|
| EVSE equipment | Roughly $400–$1,000 | Amperage, cable length, smart features, brand |
| Labor | Roughly $300–$1,500 | Run length, wall/ceiling routing, hardwire vs. plug-in |
| Permit and inspection | Roughly $50–$300 | Local jurisdiction and scope of work |
| Panel or service work | Roughly $500–$3,000+ | Open breaker slots, load calculation, service size |
| Extras (trenching, subpanel, conduit) | Varies widely | Site conditions and distance from panel |
These are aggregated planning ranges drawn from publicly discussed installer and utility guidance, not a price list. Always confirm current local pricing before committing.
Why Two Homes With the Same Charger Can See a $500+ Difference
Two neighbors can buy identical hardware and pay very different totals. The gap usually comes from the circuit run — a 15-foot run through an open basement wall is a different job than a 70-foot run through finished drywall, a garage ceiling, and exterior conduit. Panel capacity matters just as much: if the load calculation shows your service cannot support the new dedicated circuit, you may need a load-management device, a panel upgrade, or a smaller-amperage EVSE.
Permit culture also varies. Some jurisdictions issue a straightforward residential EV permit over the counter; others require a load calculation worksheet, a site plan, or a separate inspection. None of that changes the charger, but all of it changes your invoice.
Level 2 Charger and Vehicle Limits: Connector, Onboard Charger, Amperage, and kW
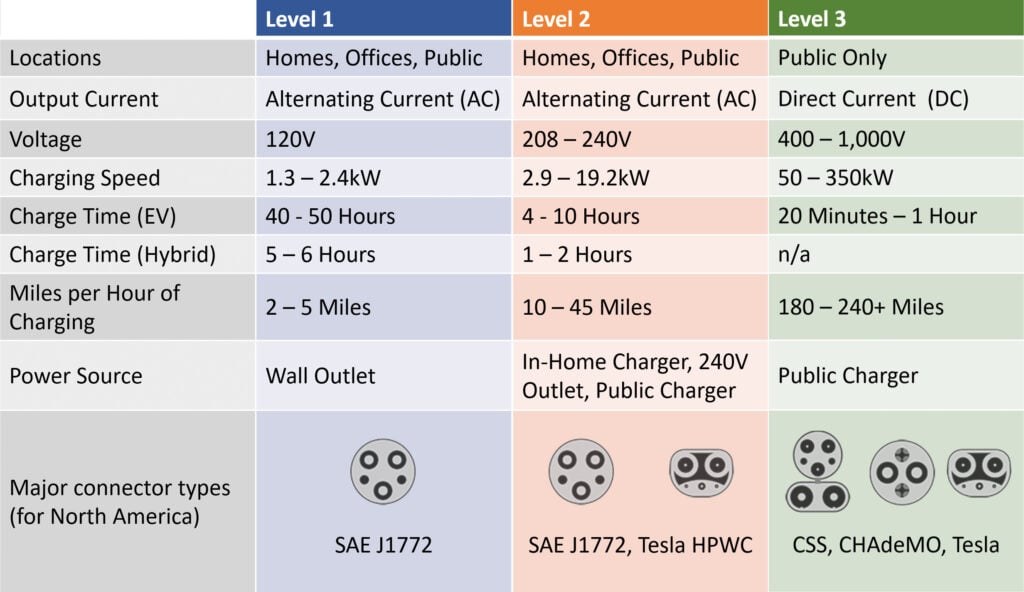
Before comparing quotes, it helps to separate three things people often blend together: the connector on the wall unit, the AC charging hardware inside the car, and the electrical circuit feeding the unit. A bigger number on the EVSE box does not automatically mean faster charging.
J1772, NACS/Tesla, and Adapter Direction for Level 2
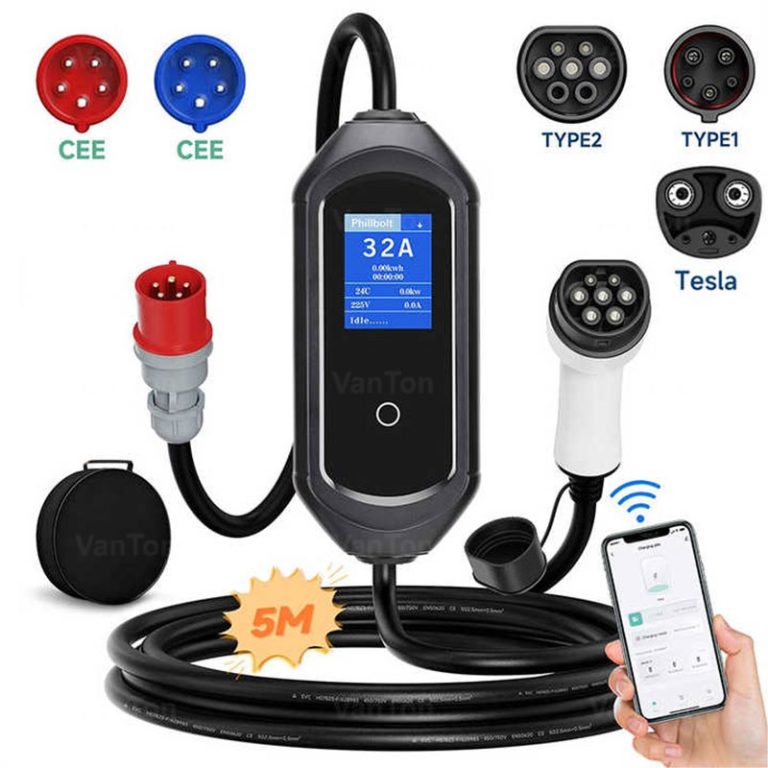
Level 2 AC charging in North America historically uses the J1772 connector. Tesla vehicles use the NACS connector, now standardized as SAE J3400. Many newer EVs ship with a NACS inlet, and many EVSEs are sold in either J1772 or NACS versions. If your car and charger connectors differ, you need the correct passive AC adapter, oriented for the direction you are using it.
Adapter direction matters. A J1772-to-NACS adapter and a NACS-to-J1772 adapter are not the same accessory, and AC adapters are not interchangeable with DC fast-charging adapters. Physical fit alone does not prove the charging mode is supported.
Vehicle Onboard-Charger Limit vs. EVSE Amperage and kW
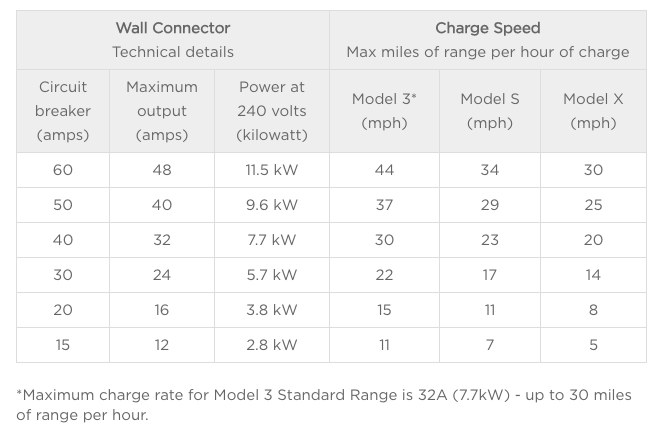
The onboard charger is the component inside the vehicle that converts AC power from the wall into DC for the battery. Its rating caps how much AC power the car can actually accept. If your vehicle’s onboard charger is limited to 32 A or 40 A, buying a 48 A hardwired EVSE will not push more power into the pack — the car will simply draw less than the unit can supply.
That is why it helps to check your vehicle’s maximum AC acceptance before choosing amperage. If you are weighing common steps, the practical difference between 40 A and 48 A is modest for most overnight charging, and owners often ask whether 40 amps is enough for a Level 2 charger. In most households charging overnight, it is.
Plug-In vs. Hardwired: Circuit, Portability, and Weather Trade-Offs
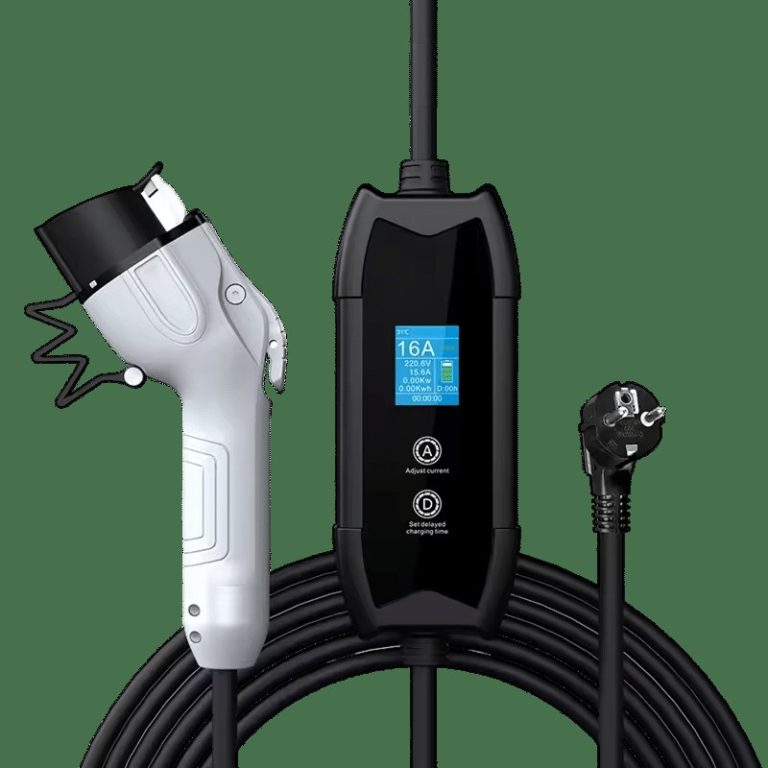
Uses a compatible receptacle on a dedicated circuit. Easier to relocate and often simpler to permit, but typically limited to lower amperage and depends on receptacle and plug ratings.
Wired directly to the circuit. Common for higher-amperage units and outdoor installs, and generally the manufacturer-recommended path for maximum output.
Plug-in setups are more portable and can travel with you if you move. Hardwired setups tend to support higher continuous current and are frequently specified for permanent outdoor mounting. Your EVSE manual and local code will determine which is permitted for your specific unit and location.
Level 2 EV Charger Installation Cost Formula: Panel, Circuit, Labor, Permits, and Equipment
A useful way to think about the total is a simple additive formula. Each term has its own uncertainty, and any one of them can dominate the final number.
Assumptions to Confirm: Service Size, Panel Capacity, and Load Calculation
Your electrician should confirm your service size, count available breaker slots, and run a load calculation that accounts for existing major appliances. Some homes can support a new 40 A or 50 A circuit directly; others need load management or a service upgrade. There is no universal answer here — the result depends on the house, not the charger.
Breaker, Wire, and Circuit Run: Follow the Product Manual and Local Code
Breaker size, conductor size, and conduit requirements come from the EVSE manufacturer’s instructions plus the applicable electrical code as adopted locally. A common question is whether a given charger requires a larger circuit than its output rating; if you are working through that for a 48 A unit, this explanation of whether a 48 amp EV charger needs a 60 amp circuit covers the continuous-load reasoning. Conductor sizing for long runs is a separate consideration, and 48 amp EV charger wire size depends on distance, insulation type, and termination ratings.
Equipment Variables: Amperage, Cable Length, Weather Rating, and Smart Features
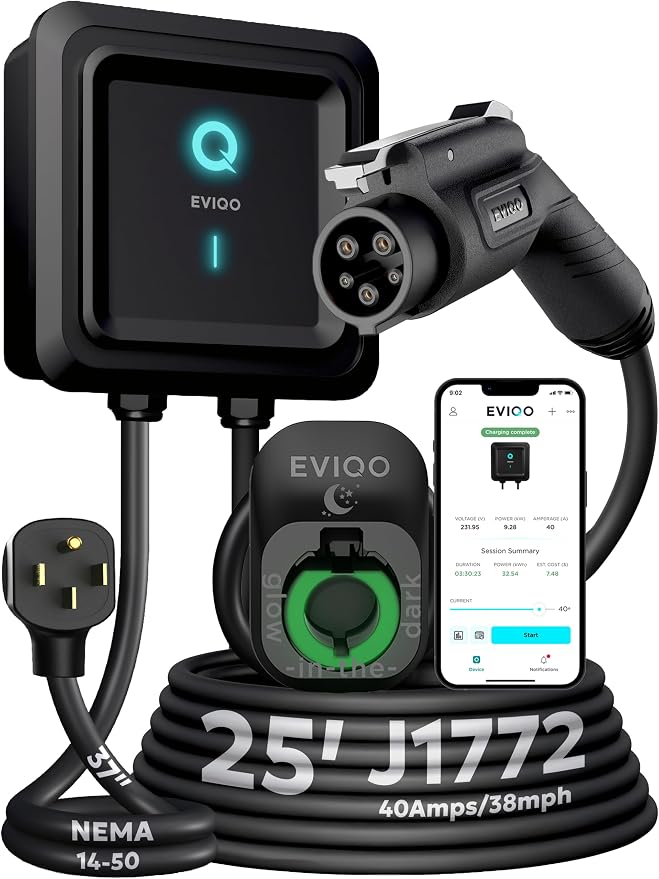
Price differences between EVSEs usually come down to maximum amperage, cable length, enclosure rating for outdoor use, and whether the unit includes Wi-Fi, load management, or energy monitoring. A basic 32 A or 40 A plug-in unit costs less than a 48 A hardwired unit with a long cable and connected features. If you are shopping at the 40 A tier, our roundup of the best 40 amp Level 2 EV charger options walks through the trade-offs, and the broader Level 2 home chargers category covers other amperage tiers.
Worked Formula: Equipment + Labor + Permits + Panel Work + Tax/Incentives
Example: a $600 hardwired 48 A EVSE, $900 labor for a moderate run, $150 permit, no panel work, plus applicable sales tax. That lands near $1,650 before any utility or state incentive. Add a $2,000 panel upgrade and the same job approaches $3,650. Incentives, if you qualify, are applied after — and their rules change, so verify current programs with your utility and state energy office.
Electricity Cost After Installation: Rate, kWh Delivered, Charging Losses, and Time-of-Use
Installation is a one-time cost. Electricity is the recurring one, and it deserves the same attention.
Cost per Charge Formula: Rate × kWh Delivered ÷ Charging Efficiency
State assumptions; rates, taxes, time-of-use pricing, and losses vary.
With a 10% loss assumption, 50 kWh delivered to the battery draws roughly 55.5 kWh from the grid, pushing the example cost to about $8.90. Substitute your own rate — the example above is illustrative, not a current national average.
Charging Losses: Why 10 kWh at the Wall May Not Equal 10 kWh in the Battery
Level 2 AC charging involves conversion losses in the vehicle’s onboard charger, plus overhead for battery thermal management and standby electronics. Typical AC charging efficiency is often cited in the high-80s to low-90s percent range, but it varies by vehicle, temperature, and charge rate. Cold batteries and very cold ambient conditions generally increase losses.
Time-of-Use Pricing, Off-Peak Windows, and Demand Charges
Many utilities offer time-of-use plans where overnight electricity costs meaningfully less than peak-hour power. If your EVSE supports scheduled charging, shifting sessions into the off-peak window can reduce your per-mile cost without changing anything about the install. Some commercial or residential plans also include demand charges based on peak kW draw; a high-amperage charger can interact with those differently than a lower-amperage one, so read your tariff carefully.
Smart Features, Cable Length, Weather Suitability, Warranty, and Support: What You Pay For
Two EVSEs with the same amperage rating can differ by several hundred dollars. Here is where the money tends to go.
Wi-Fi, Load Management, Energy Monitoring, and Scheduled Charging
Connected units typically add app-based scheduling, energy reporting, firmware updates, and sometimes utility demand-response integration. Load management is a meaningful upgrade for homes with limited panel capacity, because it can allow a higher-amperage charger on a service that would otherwise not support it. Note that cloud-dependent features can be limited if the app or service is unavailable, so check what works locally.
Cable Length, Indoor/Outdoor Ratings, and Mounting Location
Longer cables cost more and improve parking flexibility. Outdoor mounting requires an enclosure rating appropriate for the location, plus attention to connector storage and operating-temperature limits stated by the manufacturer. Where you mount the unit — garage wall, exterior post, or pedestal — affects both hardware and labor.
Warranty Terms, Customer Support, and Firmware Updates
Warranty length, the availability of US-based support, and how reliably the manufacturer ships firmware updates are real ownership factors. Read the warranty document rather than the marketing page, and confirm whether professional installation is required to keep coverage valid.
Adapter and Compatibility Checklist for Level 2 Charging
Source Connector, Destination Connector, and Adapter Direction
Identify the connector on your vehicle inlet and the connector on your EVSE. If they differ, you need a passive AC adapter rated for Level 2 use and oriented correctly. Do not assume an adapter sold for one direction works in the other.
AC vs. DC Mode and Vehicle/Network Restrictions
Level 2 is AC. DC fast-charging adapters are a different product category and are not used with a home Level 2 EVSE. Some charging networks and vehicle brands also impose their own compatibility or account requirements, so verify with the vehicle manufacturer and the network when relevant.
Power Limits, Thermal Safety, and Vendor Firmware Requirements
Adapters and EVSEs have current and thermal limits. Stay within the ratings specified by the adapter maker and the vehicle manufacturer, and keep connectors clean and dry. Follow any firmware or setup requirements the vendor publishes.
Battery Health, Range, and Efficiency: What Level 2 Installation Does and Does Not Change
Manufacturer Guidance vs. General Patterns for Daily Charging
A Level 2 install changes how quickly you can add energy, not how your battery chemistry behaves. Follow your vehicle manufacturer’s charging guidance rather than a universal rule. Different chemistries and thermal-management designs respond differently to state of charge and charge rate.
Temperature, State of Charge, Charging Power, Chemistry, and Thermal Management
Cold packs accept less power; hot packs may have power reduced for protection. State of charge affects acceptance at the top end of the pack. These are vehicle behaviors, not charger behaviors.
DC Fast Charging Context and Convenience Trade-Offs
DC fast charging is a separate mode with its own considerations. For daily home charging, Level 2 is generally the convenient default; DC fast charging is best thought of as a road-trip and time-pressure tool rather than a nightly habit.
mi/kWh and Wh/mi: Speed, Weather, HVAC, Elevation, Payload, Tires, and Battery Temperature
Vehicle efficiency varies with speed, temperature, HVAC use, elevation change, payload, tire type and pressure, and battery temperature. Published mi/kWh figures are estimates under specific conditions, not guarantees.
Charging Losses and Battery Temperature in Real-World Efficiency
Charging losses and cold-weather battery behavior both show up in your real-world cost per mile. Accounting for them gives a more honest comparison between home charging and public fast charging.
Plug-In vs. Hardwired and Basic vs. Smart: Side-by-Side Fit
Same Criteria: Cost, Power, Installation Complexity, Portability, Weather, and Smart Features
Compare options on the same axes: upfront cost, maximum continuous current, install complexity, ability to relocate, outdoor suitability, and connected features.
Who Basic Plug-In Fits
Renters with permission to install, owners with an existing compatible dedicated circuit, and drivers with modest daily mileage who value portability and lower upfront cost.
Who Smart Hardwired Fits
Homeowners who want maximum output, permanent outdoor mounting, scheduled off-peak charging, and energy reporting — particularly where load management can unlock higher amperage on a limited panel.
Who Mid-Range and High-Power Setups Fit
Mid-range 40 A plug-in or hardwired units fit most overnight commuters. High-power 48 A hardwired setups fit owners with vehicles that can actually accept that rate and who want the fastest realistic home charging.
Getting an Accurate Level 2 EV Charger Installation Quote in 2026
What to Measure and Photograph Before Calling an Electrician
Photograph your main panel with the door open, note the service size, count open breaker slots, and measure the distance from the panel to your intended mounting location along a realistic cable path. Photograph the parking area and any walls, ceilings, or exterior surfaces the run would cross.
Questions About Permits, Code, Load Management, and Rebates
Ask who pulls the permit, whether the quote includes inspection, whether a load calculation is included, and whether load management is an option instead of a panel upgrade. Ask separately about any utility or state rebate paperwork.
Red Flags in Installation Quotes and How to Compare Line Items
Be cautious of quotes that omit the permit, skip the load calculation, or list a single lump-sum figure with no breakdown. Compare quotes line by line: equipment model and amperage, circuit size, conductor type, run length, permit, inspection, and any panel work. A cheap quote that assumes your panel is fine can become an expensive change order.
- Best for: Homeowners with available panel capacity and a short circuit run, where a mid-range hardwired or plug-in Level 2 setup delivers the best cost-per-mile.
- Think twice if: Your panel is full or your service is small — get a load calculation before buying hardware, because panel work can exceed the charger and labor combined.
- Next step: Photograph your panel, measure the run, confirm your vehicle’s maximum AC acceptance, and get at least two itemized quotes that include permit and inspection.
Frequently Asked Questions
For a straightforward install with adequate panel capacity and a short circuit run, commonly reported totals fall between roughly $800 and $2,500 including equipment, labor, and permit. Jobs that require a panel upgrade, subpanel, long conduit run, or trenching can exceed $5,000. Local labor rates, permit fees, and site conditions move the number significantly, so get itemized quotes.
It depends on the manufacturer’s instructions and how the unit is configured. Higher-output hardwired EVSEs are often specified for a circuit sized above the continuous charging current, but the exact requirement comes from the product manual and the locally adopted electrical code. Your electrician should confirm this during the load calculation and permit process.
Mains-voltage EVSE installation is safety-sensitive and typically requires a permit and inspection in most U.S. jurisdictions. If you are not qualified to work on your panel and dedicated circuits, use a licensed electrician. Even where a homeowner permit is allowed, mistakes involving overcurrent protection, grounding, or torque specifications carry real fire and shock risk.
No. The vehicle’s onboard AC charger sets the ceiling. If your car accepts a maximum of 32 A or 40 A of AC power, a 48 A EVSE will simply supply less current than it is capable of. Check your vehicle’s maximum AC acceptance before paying for higher amperage hardware.
It changes charging speed, not battery chemistry. Follow your vehicle manufacturer’s guidance on charge limits and daily habits rather than a universal rule. Temperature, state of charge, and your battery system’s design all influence long-term behavior more than the wall unit does.
Photograph the open main panel showing the service rating and available breaker slots, measure the realistic cable path from panel to mounting location, and photograph the parking area and any walls, ceilings, or exterior surfaces along that path. This lets the electrician quote accurately instead of issuing a low estimate that later becomes a change order.